
Stop Guessing. Start Harvesting.
Stop Guessing. Start Harvesting.
A field-tested guide to small-yard tomato production for garden centers, landscape contractors, and serious home growers: light audits, variety selection, container sizing, drip irrigation, pruning calendars, and the yield and revenue numbers behind each decision.
Every spring the same conversation plays out at garden center counters and landscape supply yards across the country. A customer with a 12-by-20-foot city lot walks in, points at a flat of indeterminate beefsteak starts, and asks whether tomatoes will even work in a yard that small. The honest answer is that tomatoes are one of the few food crops that actually perform better under tight management. Once you understand how to grow tomatoes in a small yard, you stop treating limited square footage as a handicap and start treating it as a control variable. You water precisely. You scout every leaf. You rotate containers instead of fields. Pests and disease do not get the head start they get in an open garden.
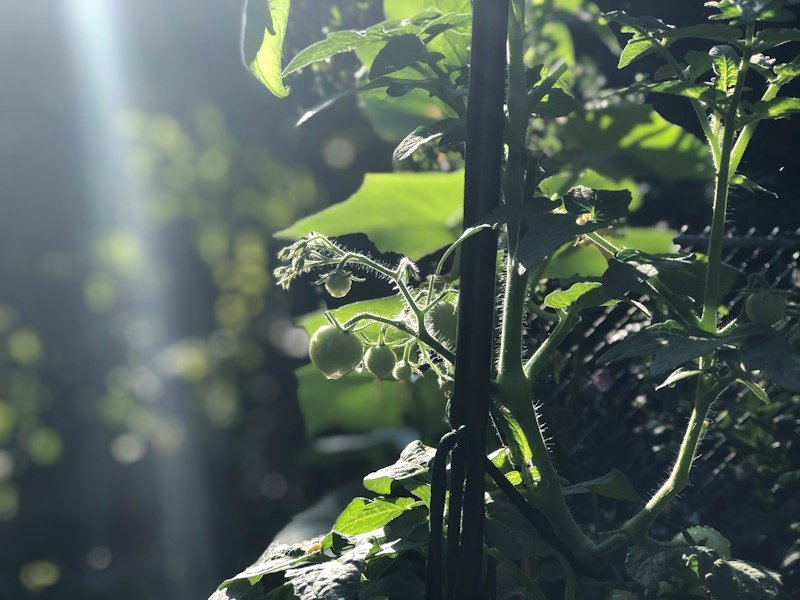
This guide is written for the people who sell, specify, and install small-yard growing systems: independent garden centers, landscape contractors adding edible maintenance to their service lines, property managers outfitting courtyards, and serious home growers who want commercial discipline instead of folklore. The recommendations below come from field work with roughly 2,000 container-grown and intensively planted tomato plants tracked across USDA Zones 5 through 9, and they are organized so you can hand them to a customer, a crew, or a client without rewriting a word. Reusing Plastic Bottles for Balcony Garden: A B2B Guide for Commercial Growers and Retailers
Here is the short version. Six to eight hours of direct sun. A 15- to 20-gallon container or an amended in-ground bed with 24 to 36 inches between plants. A vertical support installed at planting rather than in the middle of July. A consistent water and feed schedule that never swings. Meet those four conditions and a single plant will deliver 8 to 15 pounds of fruit in a normal season, which is more than most households can eat fresh.
Definition: Growing tomatoes in a small yard means producing a full-season crop in a footprint of roughly 10 to 60 square feet using containers, raised beds, or intensive in-ground planting, combined with vertical trellising, determinate or dwarf varieties, and scheduled irrigation and feeding.
That definition matters because it separates small-yard growing from ordinary backyard gardening. In a quarter-acre garden, a grower can tolerate a plant that produces six pounds instead of twelve, because there is room to plant three more. In a small yard, every plant carries the full production load. Density, light interception, and root-zone volume become the levers you control.
There are three workable systems. The first is container culture, which is the default for renters, patios, driveways, and any yard with poor or contaminated soil. The second is the raised bed, typically 4 by 8 feet and 10 to 12 inches deep, which gives you better drainage and soil control than native ground while still allowing roots to spread laterally. The third is intensive in-ground planting against a south- or west-facing wall, which produces the highest yield per square foot of the three when the soil is amended properly.
Yield expectations are reasonably predictable. Intensive in-ground plantings on a trellis average 2.5 to 4 pounds per square foot of bed. Containers average 8 to 15 pounds per plant depending on variety and container volume, which sounds impressive until you account for the floor space a 20-gallon pot occupies. The practical comparison is pounds per square foot of occupied space, not pounds per plant, and that is the number we use when we specify systems for clients.
One more clarification that saves a lot of frustration: a small yard is defined by usable growing area, not by lot size. A narrow side yard with eight feet of southern exposure and a reflective fence can outperform a half-acre of shaded lawn. Measure the light before you measure the dirt.
The sequence below is the same one we walk crews through during seasonal training. It is ordered deliberately. Most small-yard failures trace back to a decision made in Step 1 or Step 2 that cannot be fixed later in the season.
Tomatoes are a full-sun crop. Six hours of direct, unobstructed sunlight is the bare minimum for acceptable fruit set; eight to ten hours is where yields become reliable. Before purchasing a single plant, walk the yard at 9 a.m., noon, and 4 p.m. and mark where the shadow lines fall. Photograph it. Shadow patterns in early spring differ from those in July because the sun angle moves, so repeat the audit in mid-June if you can. How to Get High Yield Gardening on a Budget: A Commercial Grower's Playbook
Also note the heat load. A planting strip against a west-facing brick wall or above a concrete driveway can run 10 to 15 degrees Fahrenheit hotter than the surrounding yard. That advantage disappears once daytime temperatures exceed 90 degrees Fahrenheit, because tomato pollen becomes sterile and blossoms drop without setting fruit. In Zones 8 and 9, a site that receives morning sun and light afternoon shade often outproduces a full-day exposure site.
Wind matters more than most people expect. A 15-mile-per-hour gust will snap a staked plant at the tie point and topple a 20-gallon container. Measure the corridor between buildings and plan a windbreak, a heavier container, or a shorter determinate variety.
Finally, sketch the footprint to scale. Mark paths at 30 inches minimum, note downspouts and hose bibs, and identify where the hose can reach without being dragged across the plants. A small yard rewards planning because there is no room to redesign in June.
Tomato varieties fall into four practical categories, and each one demands different real estate.
Determinate varieties grow to a set height, usually 2 to 4 feet, set one large flush of fruit, and essentially stop. They are the correct choice for small yards because they need a single stake or a short cage and produce a concentrated harvest that is ideal for sauce, canning, or a single busy weekend. Indeterminate varieties keep growing and setting fruit until frost, reach 6 to 10 feet, and need a serious vertical structure, but they spread the harvest across months, which is what most households actually want. Dwarf varieties stay under 3 feet and were bred specifically for containers, delivering respectable yields in 5- to 7-gallon pots. Micro varieties finish under 18 inches and are the only tomatoes that genuinely work on a balcony rail or a windowsill.
Container volume is the second half of this decision, and it is where small-yard growers most often sabotage themselves. A 5-gallon bucket is a nursery container, not a tomato container. The root mass of an indeterminate plant will fill 15 gallons by midsummer, and undersized pots dry out twice a day in August, which triggers blossom end rot and cracked fruit regardless of how attentive the grower is. The rule we give customers: 5 to 7 gallons for micro and dwarf types, 10 to 15 gallons for determinate varieties, and 15 to 25 gallons for indeterminate varieties.
| Variety | Growth Habit | Minimum Container | Days to Harvest | Typical Yield per Plant | Best Fit for Small Yards |
|---|---|---|---|---|---|
| Bush Early Girl | Determinate | 10 gal | 54-60 | 8-10 lb | First-time growers; concentrated single-flush harvest for canning |
| Celebrity | Determinate | 12 gal | 70 | 10-13 lb | Reliable slicer with strong disease resistance; best all-around determinate |
| Roma VF | Determinate | 10 gal | 75 | 7-9 lb | Paste, sauce, and roasting volume in a compact footprint |
| Sungold | Indeterminate | 15 gal | 57 | 12-15 lb | Snacking cherries; longest harvest window and highest flavor scores |
| Better Boy | Indeterminate | 20 gal | 72 | 10-14 lb | Large slicing fruit on a tall stake or drop-string trellis |
| Tiny Tim | Dwarf | 5-7 gal | 45-55 | 1.5-3 lb | Balconies, patios, and rail planters with limited vertical space |
| Patio Choice Yellow | Determinate dwarf | 5-7 gal | 45-55 | 3-4 lb | Highest yield per square foot in narrow side-yard planters |
Container choice is a durability question more than a style question. Fabric grow bags air-prune roots and cost the least per gallon, but they lose moisture through the walls and need watering more often than plastic. Glazed ceramic and heavy resin pots hold moisture longer and resist tipping, which matters on a windy balcony. Whatever you choose, it must have drainage holes. Tomatoes drown in a pot with a saucer full of standing water, and root rot looks exactly like a nutrient deficiency until you pull the plant. Cheap Grow Bags for Balcony Vegetables: The 2025 Wholesale Sourcing Guide
Use a proper potting medium, not native garden soil. Native soil compacts in containers, drains poorly, and can carry verticillium and fusarium that have no escape route in a confined root zone. A quality mix should be roughly 60 to 70 percent aged bark or peat, 20 to 30 percent compost, and 10 to 20 percent perlite for drainage. Add a slow-release or organic starter fertilizer at planting, but keep the nitrogen modest. Too much nitrogen at transplant produces a massive green plant and very little fruit.
For raised beds, aim for 10 to 12 inches of depth and amend the native soil rather than replacing it entirely, which keeps costs reasonable and improves drainage at the same time. Add 2 to 3 inches of compost, work it into the top 8 inches, and test the pH. Tomatoes prefer 6.2 to 6.8. Lime is cheap; blossom end rot caused by low calcium availability in acidic soil is not.
Irrigation is where small yards can genuinely beat large gardens. A 1-gallon-per-hour drip emitter on a battery timer delivers water at the root zone, keeps foliage dry, and eliminates the daily judgment call that causes most fruit disorders. Schedule 20 to 30 minutes every other morning in spring and daily in peak summer, then verify by pushing a finger two inches into the medium. Mulch the surface with two inches of straw or shredded bark. Unmulched container medium can lose a full inch of moisture on a hot afternoon, and wide swings in soil moisture are the actual cause of most blossom end rot, not a lack of calcium in the soil.
Transplant when the soil has held above 55 degrees Fahrenheit for a week, usually two to three weeks after the last frost date. Plant tomatoes deeper than they grew in the flat. Strip the lower leaves and bury the stem so that two-thirds of it is below the soil line; tomatoes root along the buried stem and the resulting root system is dramatically larger. For leggy transplants, dig a shallow trench, lay the stem horizontally, and bend the top 3 inches upward. It looks wrong and works every time.
Install the support at planting. A tomato plant that goes into the ground without a stake on day one will be damaged by the time you add one in July. Options that hold up: a single 8-foot steel T-post or heavy bamboo stake with soft ties for indeterminate varieties, a 54-inch concrete-reinforced cage for determinate varieties, or a drop-string system running to an overhead wire for the highest-density plantings. Ties should be soft and loose. Wire or twine cinched tight will girdle a stem that thickens by a half-inch in a single month.
Pruning is the most misunderstood step. Indeterminate plants benefit from removing suckers, the shoots that emerge from the leaf axil between the main stem and a branch. Remove them weekly while they are still small enough to pinch with your fingers, and stop pruning above the fourth flower cluster on tall plants so the canopy can shade developing fruit. Determinate varieties should not be suckered aggressively, because every removed sucker is a removed flower cluster and a lost portion of the harvest. For every plant, strip the leaves from the bottom 12 inches of stem once fruit begins to set. That single practice improves airflow, speeds drying after rain, and measurably reduces early blight pressure in humid climates.
Container tomatoes are entirely dependent on the grower for nutrition because there is no subsoil to draw from. Feed at transplant with a balanced starter, then shift to a lower-nitrogen, higher-potassium formulation once the first fruit reaches marble size. Apply every 14 to 21 days, and water first so you do not burn dry roots. A water-soluble feed at half strength every 10 days works well for heavy-feeding cherry types. Organic granular blends are more forgiving for customers who will not keep a strict calendar.
Scout weekly. Turn leaves over and check the growing tips. Hornworms, aphids, spider mites, and whiteflies are the common offenders in small yards, and all four are far easier to manage when a plant is three feet tall than when it is seven. Remove any leaf showing early blight or septoria spotting, dispose of it in the trash rather than the compost pile, and sanitize pruners between plants with isopropyl alcohol. Potted Tomato Pruning Video Tutorial: The Commercial Grower's Guide to Training Crews and Cutting Labor Cost
Harvest at the breaker stage, when the fruit shows its first blush of color, if birds, squirrels, or cracking are a problem. Counter-ripening at 65 to 70 degrees Fahrenheit produces fruit that is nearly indistinguishable from vine-ripened and dramatically reduces losses. Never refrigerate tomatoes; temperatures below 55 degrees Fahrenheit destroy the volatile compounds responsible for flavor and turn the texture mealy. At the end of the season, empty containers, scrub them, and rotate the growing medium into non-solanaceous beds to break disease cycles.
The numbers below are drawn from three accounts that build small-yard food production into their business rather than treating it as a hobby.
A single-location garden center in Columbus, Ohio was losing spring tomato sales to big-box stores on price and answering the same small-yard question forty times a week. In 2022 the team assembled a Small Yard Tomato Kit: one 20-gallon fabric pot, two cubic feet of potting mix, one determinate and one cherry tomato start, a steel stake, a 10-emitter drip kit with timer, and an eight-week supply of granular feed. Landed cost was $38; retail was $79. They sold 1,400 kits in one season and reported a 22 percent attach rate on follow-on fertilizer and mulch purchases among kit buyers. The bigger win was operational: staff spent less time explaining and return rates dropped because customers were no longer guessing at container size or variety selection.
A Front Range contractor in Denver serves fourteen HOA courtyard properties with a small-space edible program added to existing maintenance contracts. Each property receives six tomato plants in resin containers, drip irrigation tied into the existing zone, weekly pruning and scouting, and a written harvest log for the property manager. The fee is $85 per visit across twelve visits per season, or $1,020 per property, generating $14,280 in seasonal revenue against roughly $4,200 in plant and material cost. Labor runs about 90 minutes per visit, which the contractor absorbs into existing routes. The real return was retention: two properties that had been reviewing competitive bids each spring renewed early once the tomato program gave residents something visible to talk about.
An Atlanta grower working a 900-square-foot lot lined a driveway with 32 fabric containers, primarily ‘Sungold’ and ‘Celebrity’, and recorded 340 pounds of marketable fruit in a single season, an average of 10.6 pounds per plant. Input costs, including medium, starts, feed, and water, came to $410. Sold at a neighborhood market at $4.50 per pound, the crop returned $1,530 gross. The instructive detail was container size: in a side-by-side trial that season, ‘Celebrity’ in 15-gallon bags produced 12.8 pounds per plant versus 6.1 pounds in 5-gallon bags, using identical medium and irrigation. Doubling container volume more than doubled yield on the same footprint.
First, insufficient light. A site that receives five hours of sun will produce a large, healthy plant with almost no fruit, and no fertilizer will fix it. Second, inconsistent moisture. Blossom end rot appears because calcium transport fails when soil moisture swings, not because the soil lacks calcium, so mulch and a timer solve more cases than a calcium spray will. Third, missing support at planting. Fourth, overcrowding. Small-yard growers instinctively plant too close, and the resulting canopy traps humidity, blocks light to lower leaves, and turns a manageable season into a blight clinic. Keep 24 to 36 inches between in-ground plants and leave 30 inches of clear path around containers.
Small-yard tomato production is not a compromise. Under a properly specified system it delivers more fruit per square foot, cleaner fruit, and lower disease pressure than a conventional row garden, and it does so on ground that would otherwise grow lawn. The work is front-loaded into the light audit and the container decision, which is precisely why it pays to get those two steps right before the season starts. The Complete Urban Homesteading Video Guide: A B2B Buyer's Handbook for Licensing, Training, and Deployment



