Stop Guessing. Start Harvesting.
Stop Guessing. Start Harvesting.
A practical B2B guide to thinning vegetable seedlings in pots. Learn when, how, and why to thin for healthier, more uniform transplants.
In commercial greenhouse operations, every square foot of propagation space carries a cost. When you start vegetable seedlings in pots, the difference between a profitable season and a subpar one often comes down to how well you manage your young plants. Thinning vegetable seedlings in pots is one of the highest-impact cultural practices you can deploy. It directly impacts transplant vigor, uniformity, disease pressure, and ultimately field or greenhouse yield.
Many growers make the mistake of skipping thinning, either to save labor or because they aren’t sure when to do it. The result is a tray of weak, spindly, root-bound seedlings that struggle after transplanting. In this guide, we’ll walk through the science and practice of thinning vegetable seedlings in pots, giving you a step-by-step protocol that works at scale. How to Sow Small Seeds in Containers: A Commercial Growing Guide
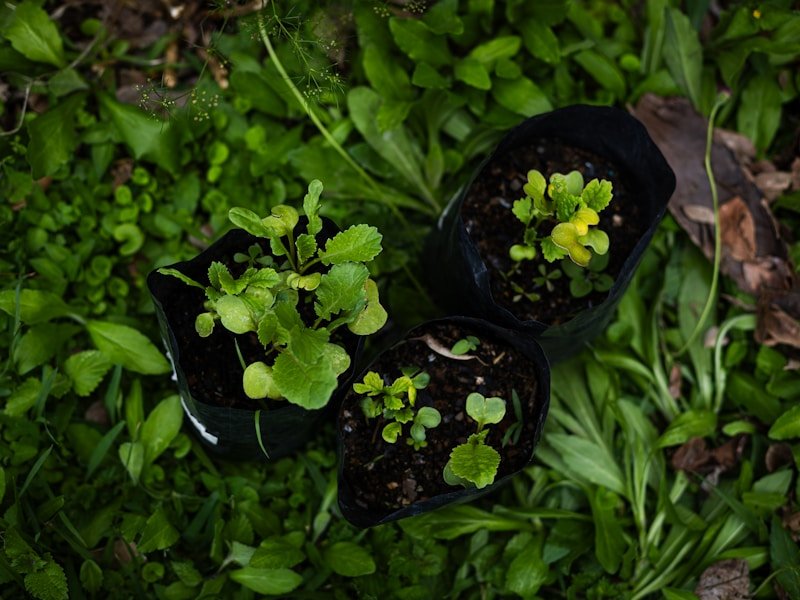
Thinning is the removal of excess seedlings from a pot or tray to leave only the strongest, healthiest plants at the correct density. When seeds are sown into pots, multiple seeds are often planted to ensure germination reliability. Without thinning, these seedlings compete for light, water, and nutrients. The result is often leggy growth, reduced root development, and increased vulnerability to disease.
For commercial growers, thinning vegetable seedlings in pots is a selective process. It’s not just about culling; it’s about choosing the best genetic expression of each seed lot. By removing weaker individuals, you allow the remaining seedling to develop a robust root system and a sturdy stem, which translates into better post-transplant survival and more uniform harvests.
The economic case for thinning is clear. Overcrowded pots produce transplants that fail to meet industry size standards, leading to lower prices or even rejections from buyers. Thinning ensures:
Beyond these direct benefits, thinning also improves labor efficiency downstream. Uniform transplants reduce the need for hand sorting at transplant time and allow for precision planting equipment to operate without clogging or misreads.
Follow these five steps to thin vegetable seedlings in pots effectively, whether you have a small trial block or a multi-acre greenhouse.
There is no one-size-fits-all answer; it depends on pot volume, crop species, and your transplanting strategy. For most horticultural crops grown in 3- to 4-inch pots, you should leave a single, strong seedling. For smaller containers like plug trays, you may keep two plants only if the culture calls for a multi-plant clump (e.g., some basil varieties). The key is to match the spacing to the plant’s canopy and root volume. As a rule of thumb, the leaves of the remaining seedling should not touch the walls of the pot after two weeks of regrowth. Phasellus Suspendisse Cursus
In 2023, a mid-sized wholesale nursery in California’s Central Valley faced recurring losses in their tomato and pepper transplant lines. The operation was sowing 4 seeds per 4-inch pot, expecting to thin manually during busy spring weeks. Time constraints led to sporadic thinning, with some trays left severely overcrowded.
The nursery conducted a controlled trial on two batches of 5,000 tomato seedlings. One batch followed a strict thinning protocol at the first true-leaf stage; the other batch received no thinning until just before shipping. Results were measured at three points: root dry weight, stem diameter, and transplant survival 14 days after field planting.
The thinned seedlings showed 31% greater root dry weight, 22% thicker stems, and a survival rate of 97% versus 81% for the unthinned group. The unthinned batch also required an additional week of hardening to reach marketable size, which cost the nursery $1,400 in energy and labor.
After implementing the thinning protocol across all production, the nursery reported a 17% reduction in cull rates at shipping and a 9% increase in order volume from repeat buyers. The labor cost for thinning was offset by a 23% drop in time spent transplanting damaged seedlings.
This case illustrates the tangible return on investment (ROI) of thinning. Even at a labor cost of $0.02 per pot, the improved survival and faster growth translated into thousands of dollars in saved revenue over a season.
Thinning alters the light environment within the canopy. Overcrowded seedlings shade each other, triggering a shade-avoidance response that causes stems to elongate and leaves to thin. By removing excess plants, you ensure each remaining seedling receives adequate photosynthetically active radiation (PAR). This leads to higher net photosynthesis, faster cell division, and stronger cell walls. Organic Worm Castings for Container Gardening: The Commercial Grower’s Guide
Root competition is another factor. When multiple seedlings share a small soil volume, root systems become entangled and often girdle each other. The surviving seedling in a thinned pot develops a lateral root distribution that maximizes water and nutrient uptake, giving it a distinct advantage during the transplant shock phase.
The right tools can make thinning faster and less damaging. Here are the most common options:
When scaling up, invest in ergonomic benches and good lighting to reduce worker strain. A well-lit, organized thinning station can increase throughput by up to 15%.
Thinning changes the micro-environment in each pot. With fewer seedlings, the remaining plant has access to more fertilizer and water, but also a larger root zone that can dry unevenly. For the first 48 hours after thinning, apply a light overhead mist or run drip lines for a shorter duration to keep the media uniformly moist.
Start a diluted liquid feed with a balanced N-P-K ratio, such as 20-10-20, at half strength to support new root growth. Monitor EC and pH regularly, as the reduced transpiration from fewer seedlings means the substrate will retain more salts.
To help you plan, we’ve compiled a table of recommended pot sizes and thinning densities for common vegetable transplants. These values are based on industry standards and nursery trials. How to Fertilize Potted Vegetables Organically: A Commercial Grower's Guide
| Vegetable | Container Diameter (in) | Seedlings per Pot Before Thinning | Target Seedlings per Pot After Thinning | Typical In-Pot Spacing (in) |
|---|---|---|---|---|
| Tomato | 4 | 4 | 1 | 2.5 |
| Pepper | 4 | 3 | 1 | 2.5 |
| Lettuce | 2 | 5 | 1 | 1.5 |
| Basil | 2 | 6 | 2 | 1.5 |
| Cucumber | 5 | 3 | 1 | 3.0 |
If you manage a large nursery or greenhouse, factor thinning into your labor forecasting. Automate the seeding stage by using precision seeders that place seeds at a known spacing, reducing the number of seeds per pot to two or three. This cuts the amount of thinning needed while still ensuring germination rates.
Adopt a standardized “thinning day” established per crop stage, and cross-train staff so the task is never delayed. Use colored tags to mark trays that have been thinned and those that are waiting. This simple visual cue prevents double-treating and saves hours each week. For larger operations, consider employing seasonal labor specifically for thinning during peak germination windows.
Investing in a camera-based plant counting system can also help you monitor thinning efficacy. These systems scan trays and flag pots with excessive seedling counts, allowing you to re-thin only the problem areas.
Thinning vegetable seedlings in pots is not a chore to be rushed. It is a strategic decision that influences every downstream stage of production. By following the protocols outlined here, you will produce transplants that are sturdier, more uniform, and better equipped to thrive after planting.
Remember to revisit your thinning rates annually. Changes in seed quality, substrate composition, and climate can all affect seedling vigor, so adapt your approach based on live observation and data. Your future yields—and your buyers’ satisfaction—depend on it. How to Prevent Root Rot in Container Plants: A Commercial Grower's Guide