
Stop Guessing. Start Harvesting.
Stop Guessing. Start Harvesting.
Master the art of sowing small seeds in containers for commercial nurseries and greenhouses. This guide covers essential techniques, step-by-step instructions, and a detailed container comparison to improve germination rates and crop uniformity.
If you’re running a commercial nursery or greenhouse operation, you already know that the difference between profit and loss often comes down to how efficiently you sow small seeds in containers. The tiny size of seeds like petunias, lettuce, and begonias makes them notoriously difficult to handle, but with the right approach, you can achieve high germination rates and uniform seedling growth. In this guide, we’ll break down the exact methods used by professional growers to sow small seeds in containers, ensuring your operation stays competitive and productive.

Whether you’re starting a new crop cycle or looking to refine your existing protocols, understanding the nuances of sowing small seeds is non-negotiable. Let’s dive into the practical steps that will save you time, reduce waste, and maximize your yield. Best Early Spring Crops for Patio: Commercial Buying Guide for 2025
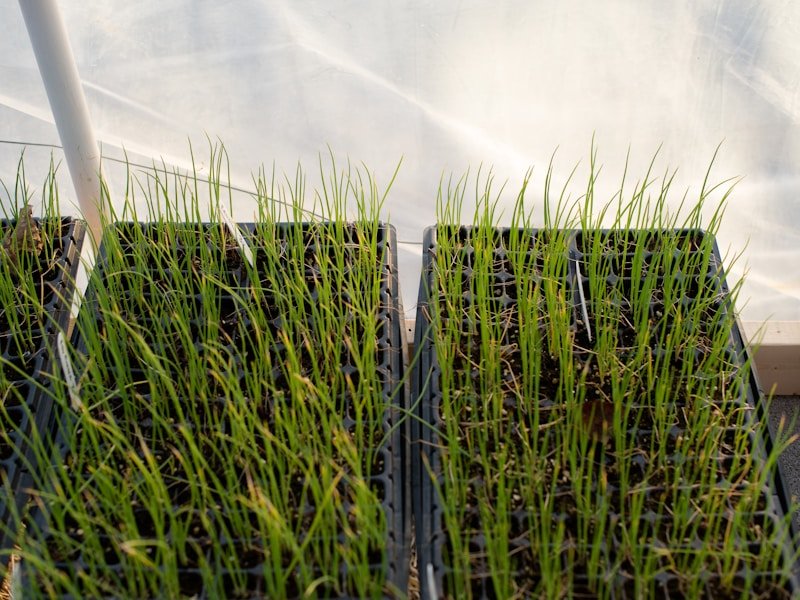
[[IMAGE_AFTER_INTRO]]
Sowing small seeds in containers refers to the controlled planting of tiny seeds (typically less than 1 mm in diameter) into individual cells, trays, or pots filled with appropriate growing media. Unlike direct field seeding, container sowing allows for precise placement, optimal moisture management, and protection from pests and diseases. For commercial growers, this method is essential for producing healthy transplants that can be mechanically transplanted or sold as plug trays.
The key challenge with small seeds is their minute size, which makes it easy to sow too deeply or too densely. Containers provide the structure needed to control depth, spacing, and environmental conditions, making them the preferred choice for high-value crops. From a business perspective, mastering this skill reduces seed costs (since you can use precision seeding tools), improves uniformity, and shortens the time to harvest.
Follow these five ordered steps, refined by commercial growers over decades, to achieve consistent results with small seeds in containers. Container Gardening for Small Spaces: Grow a Thriving Garden on Your Balcony, Patio, or Apartment
Your choice of container directly impacts root development and water retention. For small seeds, use cell trays with 200 to 512 cells per tray, or use open flats if you plan to prick out seedlings later. The media should be fine-textured, well-draining, and sterile to prevent damping-off. A mix of peat moss, perlite, and vermiculite in a 70:20:10 ratio works well. Pre-moisten the media to a uniform consistency so it holds together when squeezed but doesn’t release water.
Fill each container to the brim with moistened media, then gently tap the tray to settle it. Use a straight edge or a board to scrape off excess media, leaving a flat surface. For small seeds, do not compact the media—this reduces oxygen availability to the germinating seeds. Ensure each cell has equal volume of media to promote uniform germination.
Because small seeds are difficult to space by hand, invest in precision seeders such as vacuum seeders, drum seeders, or hand-held vibratory seeders. Calibrate the seeder to the specific seed size and set the vacuum pressure according to the supplier’s recommendation. If you’re hand-sowing, mix the seeds with fine sand (1 part seeds to 4 parts sand) to achieve even distribution. For pelleted seeds, use a seeder designed for pelleted sizes. Sow seeds on the surface, and do not cover them with media unless they require darkness for germination (check the seed packet or your growing manual). For seeds that need light, simply press them gently into the media.
After sowing, mist the trays gently with water to settle the seeds. Avoid overhead irrigation with a strong stream, as it can dislodge the tiny seeds. Place the trays in a germination chamber or under a humidity dome to maintain high relative humidity (85-95%). Set the temperature based on crop requirements—most small seeds germinate best between 65°F and 75°F. Monitor daily for the first signs of germination, and remove the cover as soon as 50% of the seeds have sprouted to prevent leggy growth. How to Grow Vegetables on a Balcony: A Practical Guide for Urban Gardeners
Once seedlings emerge, switch to bottom watering or capillary mats to keep the media moist but not saturated. Use a dilute fertilizer (half-strength) once the first true leaves appear. Regularly inspect for fungal diseases and adjust air circulation. Thinning may be necessary if you sowed multiple seeds per cell, but with precision seeding, this is rarely needed.
To give you a real-world perspective, let’s look at a case study from a 3-acre nursery in Oregon that specializes in organic lettuce and herb plugs. They were using hand-sowing methods for their small seeds, leading to uneven germination rates of around 70% and high labor costs. After switching to a vacuum seeder and the exact steps outlined above, they achieved the following within one growing season:
The owner attributed the success to the combination of proper container selection (using a 288-cell tray) and the disciplined use of a custom-made vacuum seeding attachment. This case demonstrates that investing in the right equipment and following a consistent protocol yields measurable returns. Learn to Grow Vertical Vegetables in Small Spaces (Video Class)
[
| Container Type | Cells per Tray | Cell Volume (mL) | Best Use Case | Relative Cost per Tray |
|---|---|---|---|---|
| 200-cell plug tray | 200 | 15 | Large transplants, microgreens | $1.50 – $2.00 |
| 288-cell plug tray | 288 | 10 | Standard bedding plants, multi-purpose | $1.80 – $2.50 |
| 512-cell plug tray | 512 | 5 | Very small seeds, high-density crops | $2.00 – $2.80 |
| 72-cell insert | 72 | 40 | Large seedlings, direct transplant | $1.20 – $1.80 |
| Open flat (10×20) | N/A | Variable | Pricking out method, budget-friendly | $0.50 – $1.00 |
]
When buying for your commercial operation, it’s crucial to compare different container systems and seeding tools. Below is a concise table based on current market data and field performance.
Let’s take a closer look at the factors that matter most in your purchase decision.
If you’re sourcing containers and seeders in bulk, always request samples for trials, ask for moisture retention data, and check if the supplier offers volume discounts. Also, ensure that the trays are reusable and autoclavable if you plan to use them for multiple cycles. For seeders, look for models that accommodate multiple tray sizes and offer adjustable vacuum pressure—this flexibility will future-proof your investment. From Seed to Harvest: A Complete Vegetable Garden Video Walkthrough
[
]




