
Stop Guessing. Start Harvesting.
Stop Guessing. Start Harvesting.
Transform your patio into a four-season food factory. This guide covers what year-round harvesting means, how to do it with 5 steps, real examples, a comparison table, and FAQs.
Imagine stepping onto your patio in the dead of winter and snipping fresh kale for a salad, or harvesting cherry tomatoes in the crisp autumn air. That’s the magic of year-round harvesting—a practice that turns a small outdoor space into a continuous source of fresh produce, no matter the season. I’ve been doing this on my own 8×10-foot patio for three years now, and let me tell you, it’s not just a pipe dream. With the right planning, a few simple tools, and some seasonal know-how, you can keep your patio productive all year long. Whether you’re a seasoned gardener or a newbie with a few pots, this guide will show you exactly how to make it happen. No fancy greenhouse required, just a little grit and a love for homegrown food.
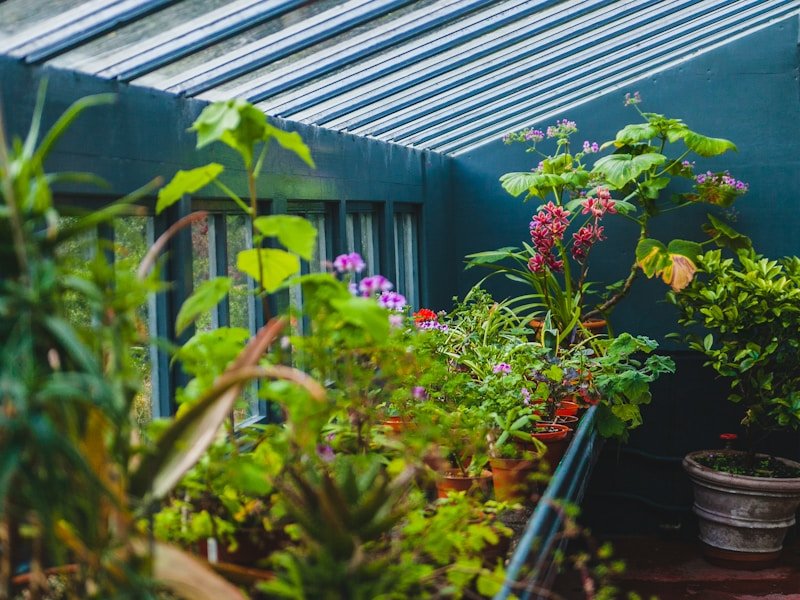
Year-round harvesting is the practice of growing and picking fresh vegetables, herbs, and fruits continuously throughout all four seasons on a patio or small outdoor space. It means you’re not limited to a single growing season—instead, you plan, plant, and maintain a succession of crops that thrive in spring, summer, fall, and even winter. This isn’t about forcing plants to grow in impossible conditions; it’s about working with nature’s rhythms, using season extenders like cold frames or row covers, and choosing varieties that tolerate cold or heat. The goal is simple: never let your patio go bare. You harvest something every month, from January’s hardy greens to July’s tomatoes. Think of it as a living pantry right outside your door.
Getting started with year-round harvesting might feel overwhelming, but I’ve broken it down into five straightforward steps that work for any patio size. These are based on my own trial and error, plus tips from fellow urban gardeners I’ve swapped stories with. Follow these, and you’ll be eating from your patio every season.
Let me share a real story. My neighbor, Sarah, has a 6×10-foot concrete patio in a Chicago suburb with harsh winters. She started year-round harvesting two years ago. In her first year, she only grew summer tomatoes and ended up with a three-month harvest. The rest of the year, her patio sat empty. Frustrated, she asked me for help. We mapped out a plan: in March, she planted cold-hardy spinach and kale under a DIY cold frame made from an old window. By April, she was harvesting salads. In May, she added tomatoes and peppers in large pots. Come September, she replaced the spent summer plants with carrots and broccoli. For winter, she used a small portable greenhouse (about $80) to grow mâche and winter lettuce. Last December, she harvested 4 pounds of greens—enough for weekly salads. Her total annual harvest? Roughly 30 pounds of produce from 60 square feet. She saved over $200 on grocery bills and says the taste beats store-bought any day. The key was her willingness to adapt and not give up after that first summer-only attempt.
Another example: I grow microgreens indoors on a patio table during winter. They take 10 days from seed to harvest. I cut them with scissors and add to sandwiches. It’s a small but consistent yield that keeps my hands in the soil year-round. Numbers don’t lie: a single 10×20-inch tray yields about 8 ounces of microgreens per cycle, and I run three trays per week. That’s 1.5 pounds a month from a space smaller than a laptop.
[TABLE_SECTION]
[FAQ_SECTION]
Year-round harvesting isn’t just a gardening trend—it’s a lifestyle shift that puts fresh, homegrown food on your table every single month. From planning a seasonal calendar and using inexpensive season extenders to practicing succession planting and learning from real examples like Sarah’s, you now have a clear path forward. Start small: pick one container, one cold-hardy crop, and one season extender. See how it feels to harvest in November or February. The satisfaction is addictive. I’d love to hear about your patio adventures—drop a comment below with your first winter harvest or any questions you have. Let’s keep our patios productive, together.
The Ultimate Autumn Cleanup Checklist for Backyard Vegetable Patches
| Method | Cost | Durability | Best For | Ease of Use |
|---|---|---|---|---|
| Cold Frame (DIY) | $20-$50 | 2-3 years | Winter greens, seedlings | Easy |
| Pop-up Greenhouse | $50-$100 | 1-2 years | Full-season protection | Very easy |
| Row Cover | $10-$30 | 1-2 years | Frost protection, pest barrier | Easy |
| Cloches (plastic) | $5-$15 each | 1 year | Individual plants | Very easy |
| Shade Cloth | $15-$40 | 2-3 years | Summer heat protection | Easy |
| Portable Cold Frame (store-bought) | $60-$150 | 3-5 years | Winter harvesting | Moderate |
Year-Round Harvesting: How to Keep Your Patio Productive All Seasons
The Ultimate Autumn Cleanup Checklist for Backyard Vegetable Patches
When space is tight, think upward. Vertical gardening lets you grow more in less square footage by using trellises, wall-mounted planters, hanging baskets, and tiered stands. Climbing crops like pole beans, peas, cucumbers, and even small squash varieties thrive on a sturdy trellis. For leafy greens, install a pocket planter on a sunny wall or fence. Hanging baskets are perfect for trailing herbs like thyme and oregano, as well as strawberries. A simple DIY solution: attach a wooden pallet to a wall, line it with landscape fabric, and plant herbs or greens in the gaps. This not only multiplies your growing area but also creates a lush, attractive backdrop for your patio.
Remember to place taller plants so they don’t shade shorter ones—orient your vertical garden from south to west for even light. Use lightweight potting mix in wall planters to avoid putting too much stress on mounts. Water more frequently, as vertical containers dry out faster than ground-level pots. With vertical gardening, even a 4-foot-wide balcony can produce a surprising bounty.
Staying consistent with small tasks each season keeps your patio productive year-round. Here’s a quick checklist to guide you:
Keeping a simple log of what you planted and when will help you adjust for next year. Review what worked and what didn’t—that’s the secret to improving your harvest every season.
| Material | Cost | Weight | Drainage | Best For | Lifespan |
|---|---|---|---|---|---|
| Plastic | $5–$20 | Lightweight | Good (with holes) | Budget-friendly, easy to move | 5–10 years |
| Terracotta | $15–$40 | Heavy | Excellent (porous) | Aesthetics, prevents overwatering | 5–10 years (cracks in freezing temps) |
| Fabric | $10–$30 | Very lightweight | Excellent (air-prunes roots) | Root vegetables, vigorous growers | 2–4 years |
| Self-Watering | $20–$60 | Medium | Excellent (reservoir system) | Tomatoes, peppers, busy gardeners | 3–7 years |




