![]()
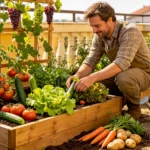
Stop Guessing. Start Harvesting.
![]()
Stop Guessing. Start Harvesting.
Do you find yourself guessing when to water your potted vegetables, swinging between leaving them bone-dry or turning the soil into a muddy swamp?
You are not alone. Inconsistent hydration is the number one reason beginner container gardens fail. Because potted plants are isolated from the natural ground ecosystem, their soil dries out significantly faster. Water too little, and your plants will drop their blossoms and stunt; water too much, and you will drown the roots, causing fatal root rot. Finding the perfect balance is the key to a heavy, continuous harvest.
This guide will teach you exactly how to determine when your container vegetables need water so you can stop guessing and start growing with absolute confidence.
As a general rule, container vegetables need to be watered whenever the top two inches of soil feel completely dry to the touch. During cool spring months, this might mean watering every 3 to 4 days; however, during peak summer heat waves or high winds, large fruiting crops like tomatoes and peppers will often require thorough watering once or even twice a day.
Traditional backyard gardens can rely on deep groundwater reserves, but container networks are entirely confined to a fixed volume of space.
The five environmental factors that dictate container water loss include:
Follow this systematic operational routine to keep your container vegetables perfectly hydrated without risking root damage.
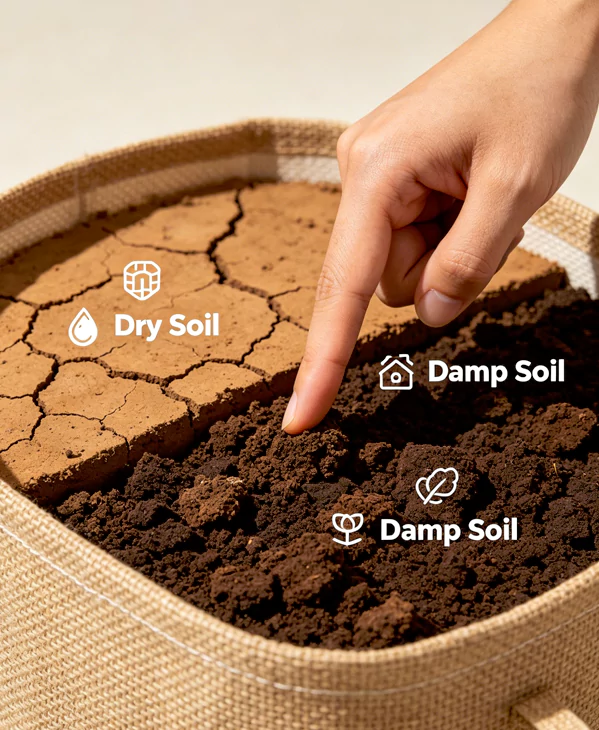
Never water your plants strictly based on a fixed calendar schedule. Before grabbing your watering can, insert your index finger two inches deep into the soil mix. If the soil feels cool, damp, and sticks to your skin, leave it alone. If it feels completely dry, powdery, and loose, it is time to water.
Get familiar with the physical weight of your containers. Pick up or tilt your pot right after a thorough watering—notice how heavy it feels when fully saturated. Check it again a few days later when the soil is dry. You will quickly learn to judge exactly when a plant needs hydration simply by lifting the side of the pot.
When it is time to water, pour water slowly onto the soil surface near the base of the plant. Do not just splash the top layer. Keep pouring until you see water streaming freely out of the bottom drainage holes. This guarantees that the entire root ball, all the way to the base of the container, is completely saturated.
While drainage trays are essential to protect your patio floor from stains, leaving your pots sitting in a deep puddle of stagnant water for hours is dangerous. If water is still sitting in the saucer 30 minutes after watering, empty it out. Leaving it trapped suffocates the lower roots and triggers rot.
Avoid these common structural hydration traps to keep your small-space garden vibrant and healthy:
Investing in a few simple, targeted accessories takes the guesswork out of watering and automates your daily plant maintenance.
| Tool | Why It Helps |
| Soil Moisture Meter | Uses a physical probe to read exact moisture levels deep inside the root zone instantly. |
| Long-Spout Watering Can | Delivers water precisely to the base of dense plants without spilling or splashing foliage. |
| Self-Watering Containers | Features a built-in bottom reservoir that lets plants drink consistently via capillary action. |
| Pot Feet / Elevators | Lifts pots slightly off hot concrete floors to lower heat transfer and improve air drainage. |
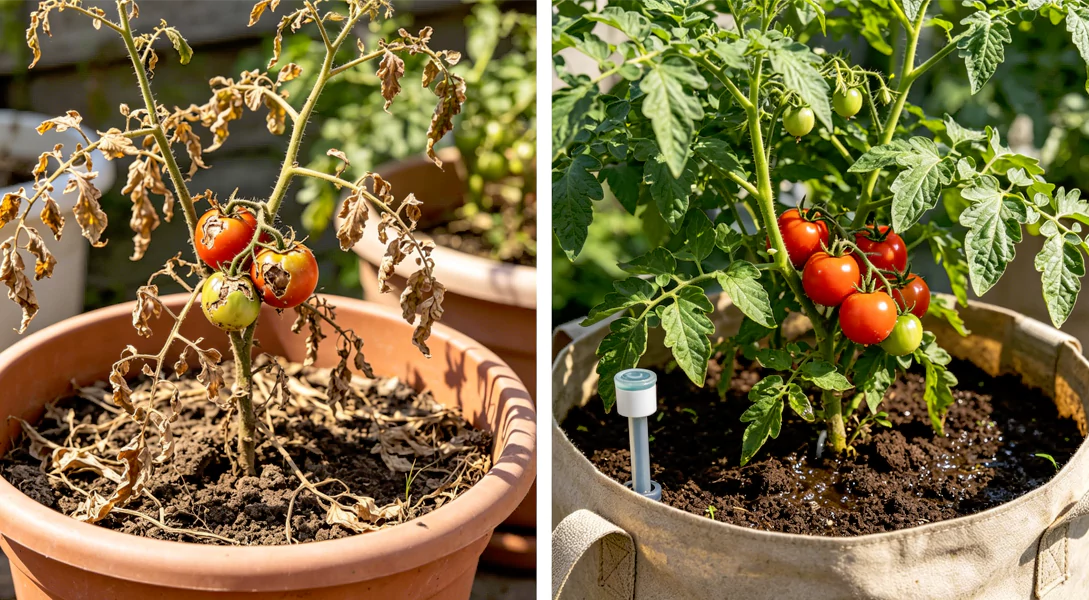
Tom, a software engineer with a sunny south-facing apartment patio, was thrilled when his cherry tomato plants began flowering. However, as the fruits formed, the bottoms of the tomatoes turned black and rotten.
Morning is the absolute best time to water. This allows the plant to drink up moisture before the midday sun hits, and any accidental water drops on the foliage will evaporate quickly in the daylight. If you must water in the evening, avoid splashing the leaves to prevent damp-loving fungal issues overnight.
When peat-based potting soil gets completely dried out, it becomes hydrophobic—meaning it repels water. The soil shrinks away from the edges of the pot, allowing water to slide right down the inside walls and out the bottom holes without wetting the roots. To fix this, water the pot slowly in small stages, or set the entire container inside a bucket of water for 20 minutes to rehydrate the soil.
Yes. Because fabric grow bags are breathable, water evaporates through the sides of the container as well as the top. While this extra aeration is incredible for root health and prevents overwatering, it means the soil dries out faster. Keep a closer eye on them during hot stretches, as detailed in our Balcony Gardening Mistakes guide.
The most common sign of overwatering is yellowing leaves, especially near the base of the plant. The stems may also look limp or mushy, and the soil will emit a sour, stagnant odor. If you notice these symptoms, stop watering immediately, check that your drainage holes aren’t clogged, and let the soil dry out.
For short trips (3 to 4 days), give your pots a thorough soak right before you leave and move them into a shaded corner out of direct sun. For longer vacations, install simple terracotta watering spikes attached to inverted water bottles, or invest in an affordable automatic drip kit, a strategy covered in our How To Start A Balcony Vegetable Garden For Beginners roadmap.
Stop guessing if your plants are thirsty. Download our free watering and moisture companion kit to keep your container ecosystem perfectly balanced.
Download our free resource today and receive:
[ Info@yardveggie.com ]
👉 [ DOWNLOAD YOUR FREE WATERING KIT NOW ]
If you want to skip the frustrating trial-and-error phase and discover the exact visual systems used to manage water, nutrients, and layouts in compact urban areas, take a look at our structured video series. Our comprehensive Balcony Harvest Masterclass offers an interactive, step-by-step roadmap designed specifically for small-footprint living.
Bypass the guesswork with high-definition, practical tutorials covering:
[ Learn More About The Masterclass → ]